After months of being a paying customer, I was given this month's box for free in exchange for my personal experience!
Wednesday, February 22, 2017
Unboxing of Mother Goose Time March Box - At the Pond
Here is the unboxing of Mother Goose Time's March Box: At the Pond! This is the Homeschooling curriculum kit I use for my 3 year old (and now my 16 month old) daughters! It comes with 20 days worth of activities, projects, lessons AND SO MUCH MORE! Check it out!
After months of being a paying customer, I was given this month's box for free in exchange for my personal experience!

After months of being a paying customer, I was given this month's box for free in exchange for my personal experience!
Friday, February 17, 2017
Pat-A-Cake Perfection with Mother Goose Time

One day of Mother Goose Time really stood out this week as Bella's favorite so I had to share! Mother Goose Time is the monthly homeschooling kit I use to teach my 3 year old. It comes with projects, activities and supplies for 20 days and SO MUCH MORE! I have posted previously about it on my blog like here .
Today's theme was Pat-A-Cake! Bella is my little baker who loves anything to do with cooking so she absolutely loved today's activities! We started off by reciting Pat-a-Cake since it is one of her favorite Nursery Rhymes.

Next we played this cute cake game that helped Bella with her number recognition, shape recognition and counting.

She was also able to help me separate the hearts from the cutouts. Little exercises like this have really helped her develop her motor skills in a new way.

Bella would choose a card, announce which number it was and then place that amount of hearts on the cake. She also matched the different sized hearts with their correct sized silhouette on the cake.

She was so proud of herself when she filled up the whole cake!

The next part of the day is always Bella's favorite: craft time! This Invitation to Create was super cute.
Bella created her own "cupcakes". While the recipe called for Shaving Cream, we went a little outside of the box and used real frosting!


Her favorite part was definitely putting the sprinkles on top!

Oh, and of course trying the frosting and sprinkles for herself!

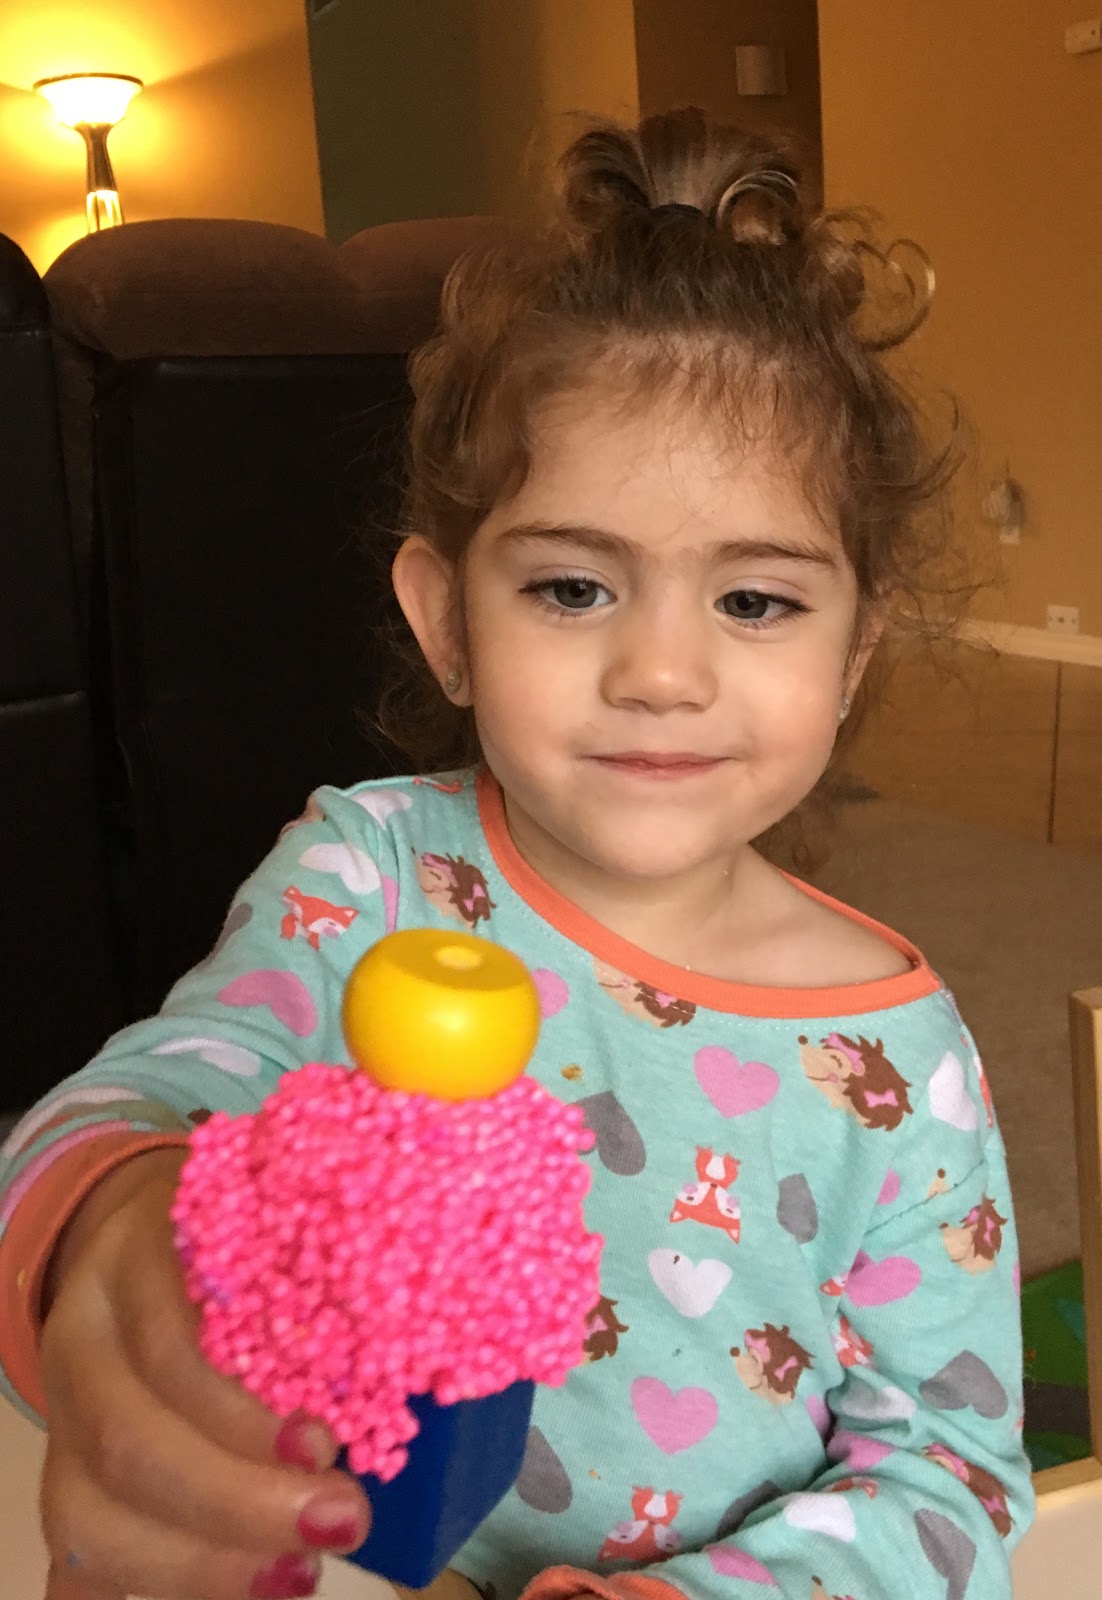
After her first cupcake she was in the mood to create more cupcakes so we used her manipulatives to create out own cupcakes with Floam.

She even put a "cherry on top"!

I love to watch the creativity she uses during class time.
Lastly, to clean up, I had her string her manipulatives onto her shoe string (included in this month's kit). Her fine motor skills are leaps and bounds above what they were when we started Mother Goose Time! I loved watching her accomplish putting all the Blue on her string! The manipulatives are one of my favorite things included in each box.

After months of being a paying customer, I received this month's box for free in exchange for my personal experience!
Sunday, February 12, 2017
A Week Full of Love - Homeschooling with Mother Goose Time


First, we created this awesome Invitation to Create! With this photo as inspiration, Bella very carefully placed beads on the Pipe Cleaners and twisted it around our heart shaped Pipe Cleaner.

This was incredible for Bella's hand-eye coordination. I was impressed with how she was able to get the little beads on the pipe cleaner all on her own!


Next, we used her Heart shaped stamp (included in this month's kit), a red marker and her Heart page in her My Little Journal to let her create a page all of her own.

For the My Little Journal I like to give Bella free range so she can create whatever she wants. She decided to stamp lots of hearts and fill it with her marker.
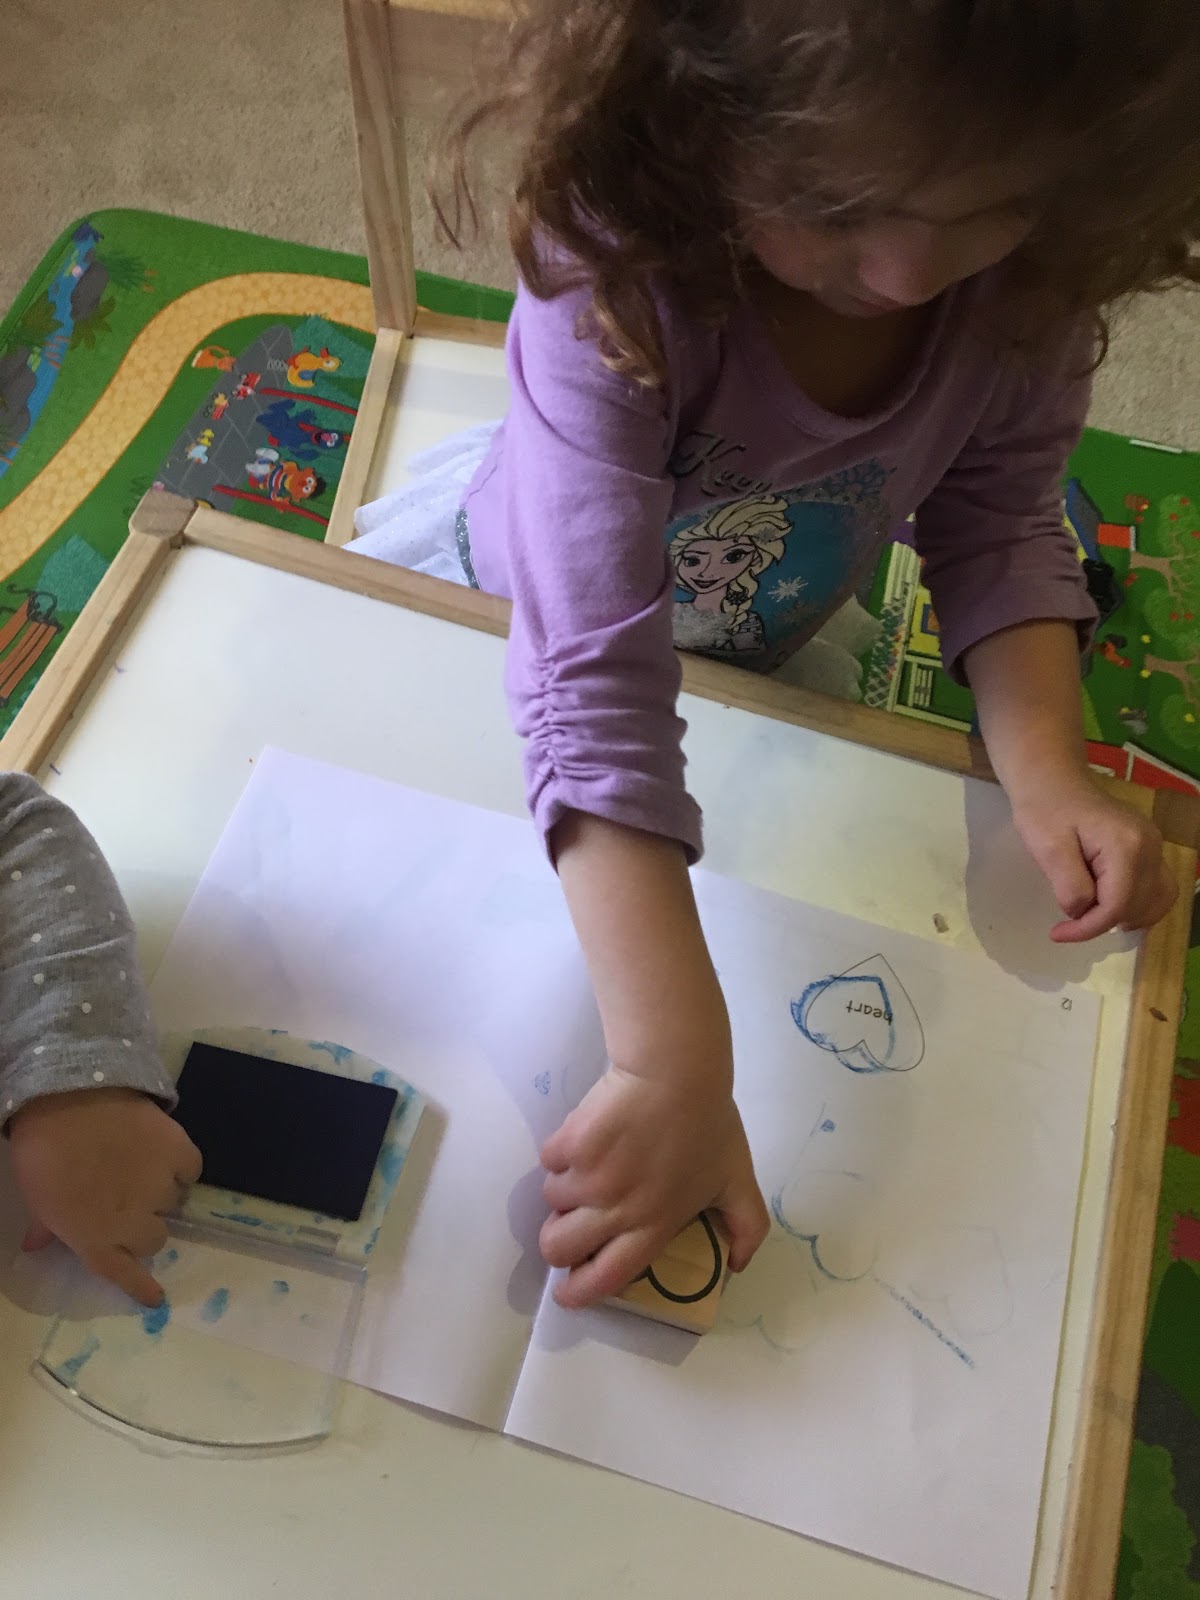

While it may not seem like a big deal, Bella has become so much better and staying inside the lines and concentrating on filling certain areas! I'm so proud of her!

In preparing for making our Valentines for family, we got in the holiday spirit by breaking into our Valentines Pack (included for free in this month's box). It's also available to download for free here!
The first item was this super cute Valentines head band!

Bella has really improved on her cutting and wants to cut whenever is possible! She was my little helper and cut tissue paper to fill the hearts.

Her coordination has also improved drastically! She now can help with tape and put the pieces on herself.


She concentrates so hard! I love how involved these projects keep her.

The finished product! Bella loved her headband, but not being a model! HA!

Next we played this fun letter game! Each piece has one capital letter and one lower case letter. It helped her learn this new concept in a fun and easy way!


Lastly, today on Sunday we did our Experience God activity which also was heart themed! For this project Bella decorated a heart pocket and weaved yarn to create a pocket for Bible verses!

Bella and Trinity had fun pouring the glue on the heart. I've been letting Trinity get more involved in our crafts and she really enjoys them as well! I am thinking it's time to order enough supplies for her to join in on the fun and learning!


Of course we had to add glitter! Included in the pack of course. They give you everything!!!

While our glue and glitter dried, Bella cut out her verses and we read them together.

The stringing of the yarn was another excellent exercise to improve Bella's coordination. The pocket turned out so cute and I LOVE the cards that Bella can now use to memorize verses!

All of these awesome crafts and projects have made for a great Valentines prep! Don't forget to head over and get you free kit! Not only are these projects fun to make, but they teach your child so many skills and new topics in a easy and interesting way!
After months of being a paying customer, I received this month for free in exchange for my honest feedback!
Friday, February 10, 2017
DIY Handprint Bouquets

Just in time for Valentines Day! This craft is fun, cute and simple!

For this project you will need:
Paint (Red)
Paint Brush
Paper (I used regular construction paper)
Pipe Cleaners (Green & Pink for a bow)
Scissors
Marker
Tape/Hot Glue Gun
Laminating Paper (optional)
First, paint the child's hand. I stuck with one hand to make clean up easier. I've learned the less paint the better. Do an even layer over the entire hand.

Next, press the hand firmly and press over each finger. Pinkies and Thumbs are easily left off if you don't give them a little help.

Perfect! Now, do this as many times as you would like! I did 2 handprints per child, per bouquet. I would have definitely added more if I was only making one bouquet.

Lay the papers flat to dry. Mine dried fairly quickly, within 30 minutes.

When the handprints are dry, begin cutting them out along the edge. I did my daughter's handprints in two different shades so I could clearly tell whose were whose.

After I cut out the handprints I labeled them on the back with my child's name, the year and their current age.


If you are using tape, you will want to write this information on the back top of the handprints so it does not get covered.

After this step, I self laminated the handprints. This was by far the most complicated part. I am the world's worst laminator and always somehow mess it up. Surprisingly, it didn't go too bad. This step was more to protect the paper and handprints so they would last throughout the years for memories! Again, this step is completely optional.

After you cut out the handprints, you can attach them to the "stem". I used a hot glue gun and it worked like a charm! I simply placed the glue on the back of the handprint and laid the pipe cleaner on top and pressed it down securely.


Now you will have beautiful handprint flowers!

I twisted the bottoms of the stems together and tied it with a pink bow to finish it off!

I'm going to play around with different ways to finish off the bouquets and will update the blog later! Have fun creating your own unique bouquets for your loved ones!
Subscribe to:
Comments (Atom)